Using saved filters on featureOS
Filters play a crucial role in data analysis, allowing teams to sort information based on specific conditions such as time periods or submitter details. With featureOS, using filters has become more efficient than ever before, as you can now save and reuse your filter settings with ease.
Applying and Saving Filters
To get started, choose all the required filter items on your dashboard and click on Save view.
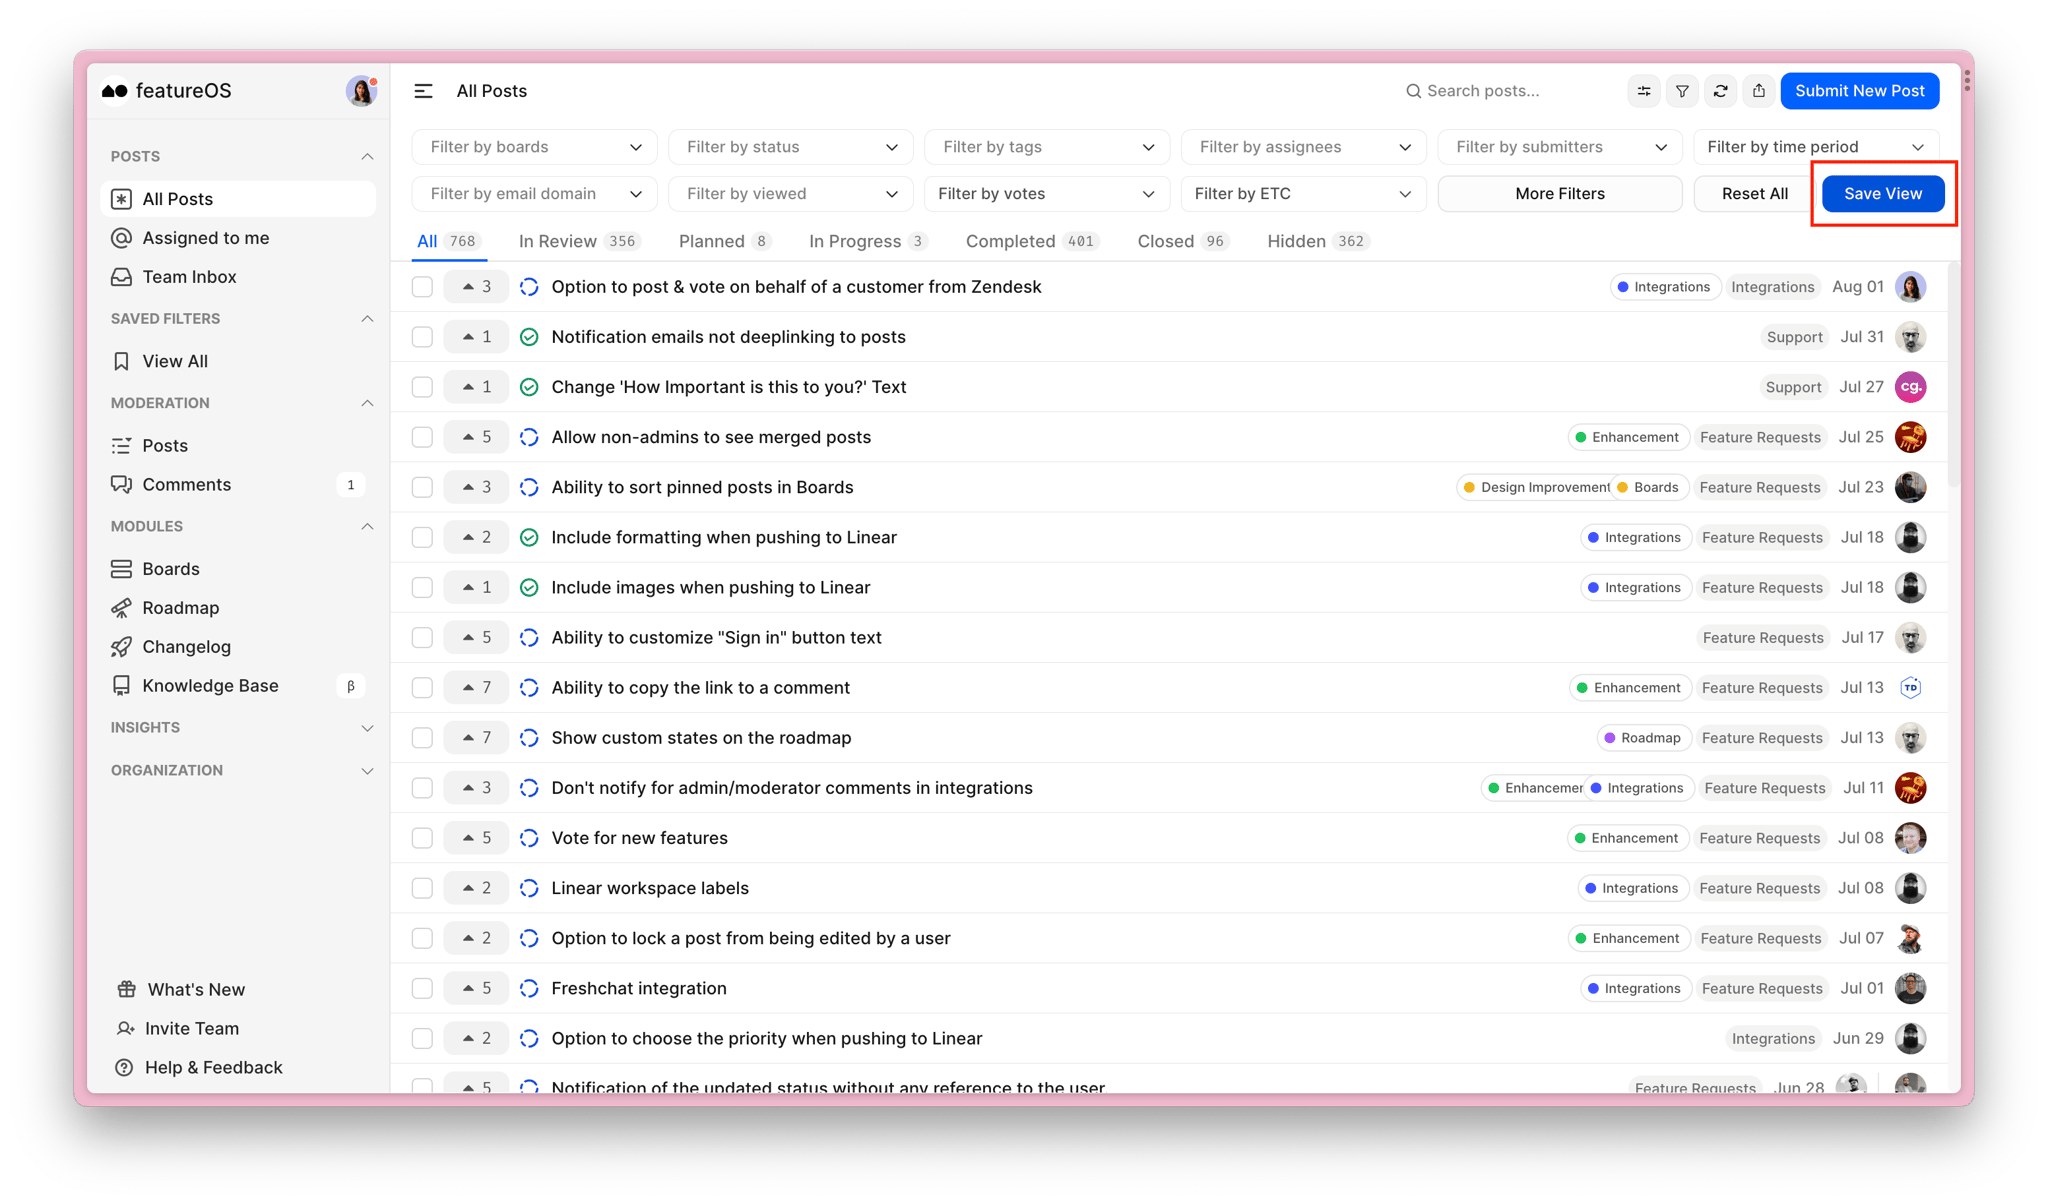
You will be prompted to create a new saved filter, and you can add more filter items as needed.
Give a name to your filter to easily identify it later.
Optionally, enable the Personal filter toggle if you want the filter to be available only to you. Your team members won't see this filter on their dashboards.

Once done, click on Save.
Accessing Your Saved Filters
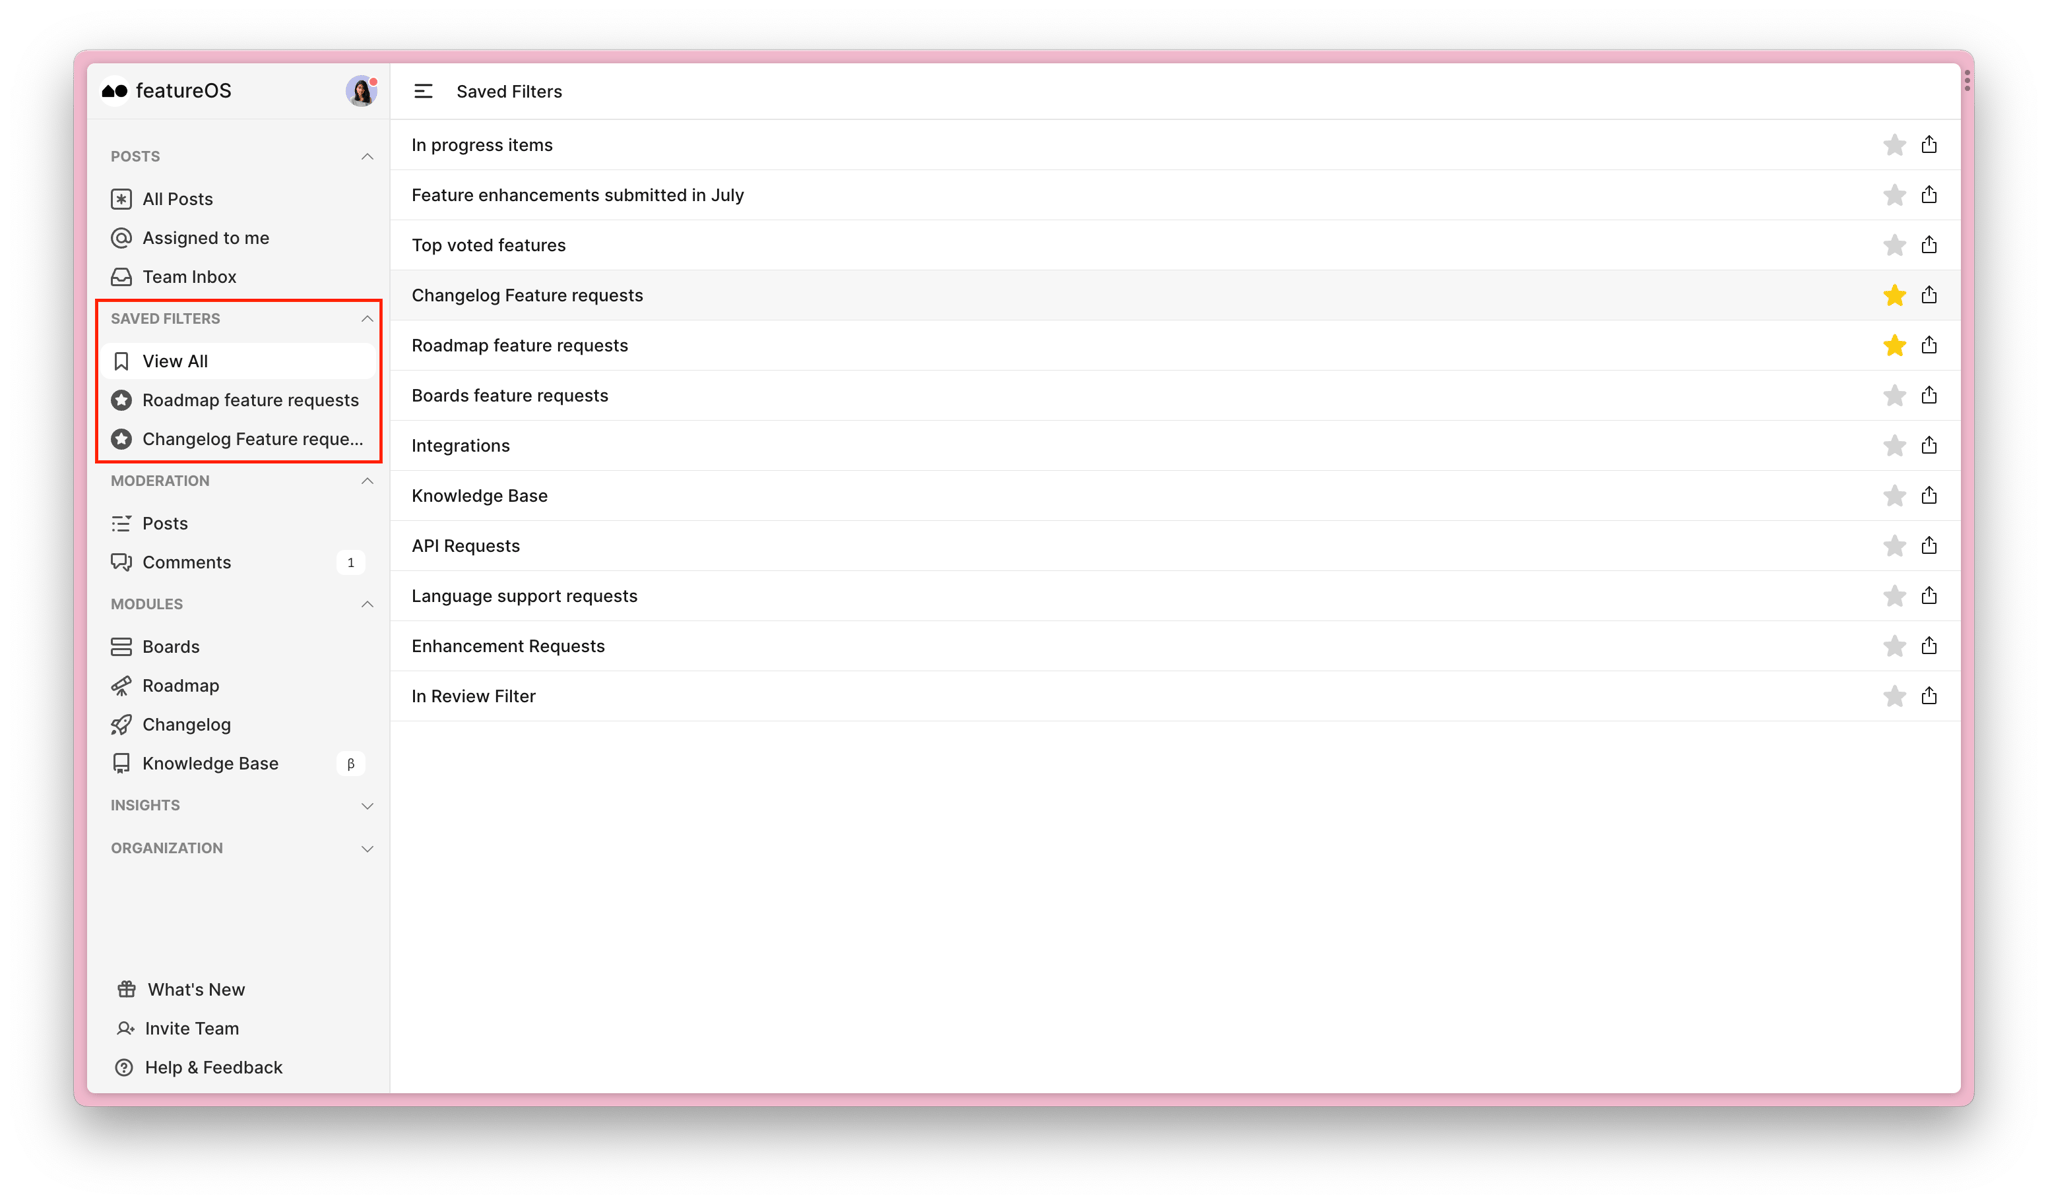
To view your saved filters, navigate to the "Saved Filters" section in the left panel of your dashboard.
Here, you'll find all your saved filters listed.
To mark a filter as your favorite, simply click on the ⭐️ icon next to it.
Filters marked favorite appear on the left pane for quick access whenever needed.
Editing Saved Filters
Choose the required filter from the section on the left panel of your dashboard.
You can either directly add necessary filters, click on "Edit view," and then click Save.
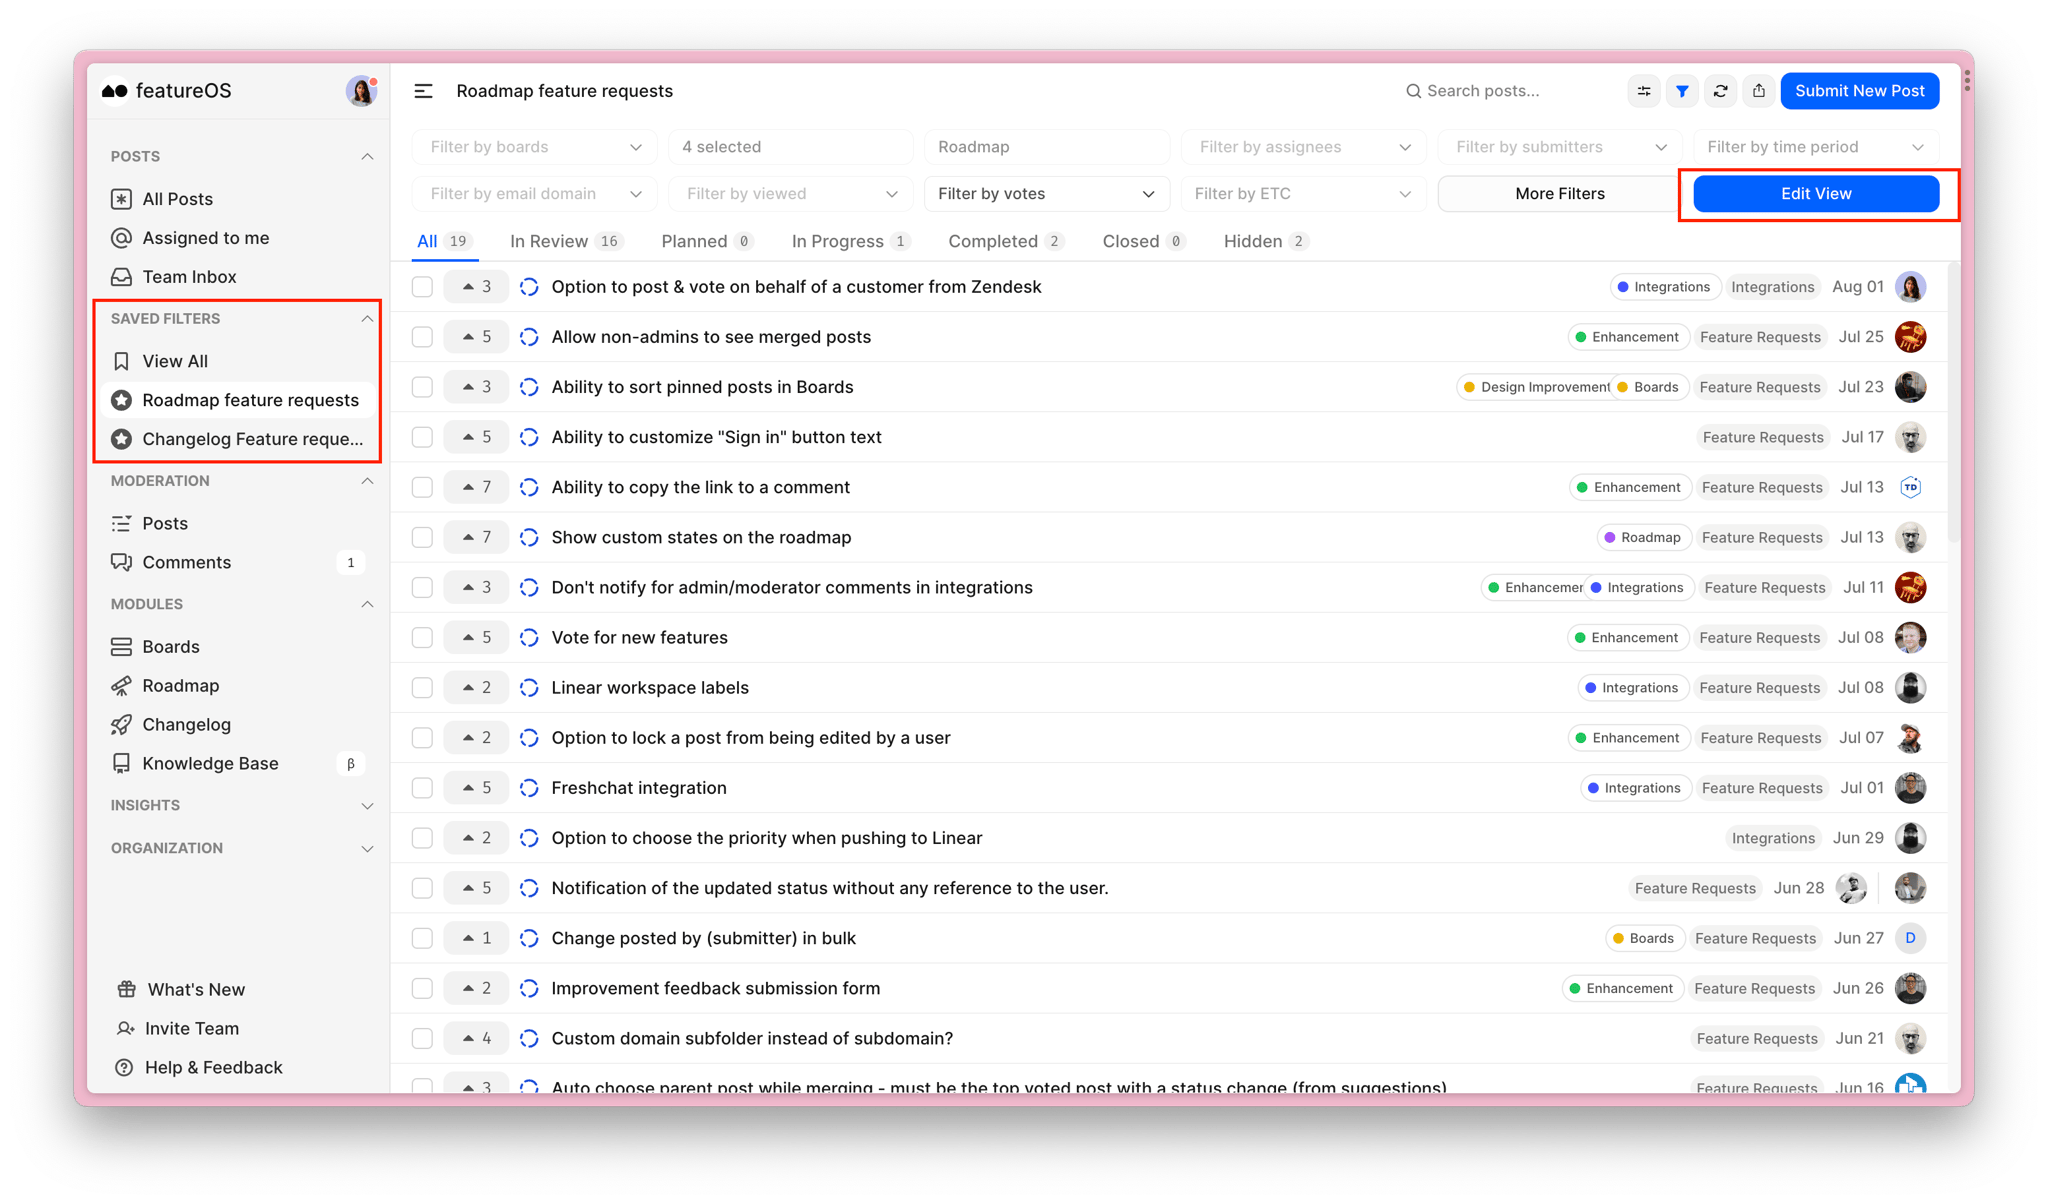
Alternatively, click Edit view make the changes, and then click Save.
Need more help?
Reach out to our support at [email protected] or submit a request on our support board! 😃